Tuesday, May 15, 2018

How To Fix Drag and Drop in VMWare Workstation Pro?


So you have already installed an OS in your VMWare Workstation but it is not really that useful when you could not copy your files directly. In some initial installation of the VMWare, the drag and drop feature might already work but if it is not, read the guide below.

In this case, I have a Mac OS installed in my VMWare Worksation 12.

Step 1. Try installing the VMWare Tools by VM > Install VMWare Tools..., then a reboot is mandatory. Just follow the installation steps. After reboot, one indicator that the installation is successful is if the resolution of your virtual machine changed.


Step 2. If the first step didn't work, try adding a floppy disk. You can do this by switching off the virtual machine first.


Step 3. Go to Edit Virtual Machine Settings


Step 4. Select Floppy Drive > Next


Step 5. Select Use a physical floppy drive > Next

 Step 6. Select Auto-detect and tick Connect at power on. Click Finish.


Step 7.  Power on the machine and re-install the VMWare Tools. You might have to do this twice then reboot again the virtual machine.

Ignore any information dialog, just press OK.


Step 8. After reboot, go to Settings > Options Tab > Enable Drag and drop


Step 9. Try the Drag and Drop feature now. Good luck!

Hope this works for you.

Sources:
https://www.youtube.com/watch?v=WaWPaqqbjmM


Thursday, July 13, 2017

How To Bookmark Without Dog-ears and Clips On Your Books?


READING IS PLEASURE.

Though this is my personal belief, I am pretty sure it is also the belief of many. But have you ever experienced the nuisance of missing your bookmark because it fell under your seat during a flight, in a bus or simply in your home?

Aha, I've got one pretty smart solution that would free your hand from pressure of  trying to hold the pages so as not to lose your bookmark or  will avoid ruining the pages due to dog-ears.

This is what I do just immediately after I unwrapped a book I buy from anywhere.

Step One.  Get a piece of ribbon, the thin one, about four inches longer than the height of the book.

[photos to follow]

Step Two. Using an adhesive, may it be glue gun or tape, stick one end of the ribbon to the back of the book, on the top part. It should be near the spine and you're done!

[photos to follow]

Now, you have an instant DIY bookmark of your own without ruining your books' pages or havinf a detached bookmark that can you can lose anytime.

Happy DIYing!

Wednesday, July 12, 2017

How To Earn Money While Losing Weight?

Hit two birds with one stone!


While queuing in BPI to make a transaction, I noticed there campaign video for BPI-Philam. They featured an app called Philam Vitality Active App where you can earn rewards while working out. Great way to get (sort of) free stuffs!


Step 1. Download Philam Vitality Active App from Playstore or Apple Store
Step 2. Sign up, Promo Code: bplacwtm
Step 3. Work you butt out. Walk, jog, lift weights and push for that 250 points. Below is how your points calculated.


If you accumulate 250 points for two consecutive weeks, you earn rewards.

For more information, visit:
https://www.philamlife.com/content/dam/ph/en/docs/faqs/philam-vitality-active-faqs.pdf


References:

Sunday, May 21, 2017

How To Apply for an NBI Clearance Online?


If you are in need of an NBI clearance right away, worry no more because the process is now automated and the pre-registration is all done online.

Just a brief background, before, once you arrive at the NBI office, you will fall in line for a couple of hours then you have to do the registration manually on paper. That'll will take time. And if that is not enough, you will still have to wait another couple of hours to see if you have a "hit". A hit means that some parts of your name or your full name have a match with another individual which has a criminal record. That means, you will still need to wait a week so that NBI can clear your name and you your clearance. You will dedicated a day or if you have hit, two days. Hassle huh?

Well, luckily it is less of a hassle now because the registration is done online. You will sign up in the NBI site entering your personal information and plot a schedule in your preferred branch. This way, before you go to the branch, a "hit" can be searched beforehand. Although, the falling in line part will still take around 2 hours.

Note: You can't apply for a clearance now without an appointment made online.


To apply for a clearance, follow these steps.

1. Proceed to https://nbi-clearance.com/ . The website looks like the below image, if not, do not proceed. Some sites copy government websites to just get your personal information.

2. Register.
3. Log-in.
4. Your profile is displayed. Check if your information are correct. If not, click the Edit Information. If all are correct, click the Apply Clearance.

5. Select a branch.
6. Select a schedule.
7. Select a payment option, then pay your clearance for P115.00. Once your payment is paid, proceed to Transaction.

8. Click Details and print your application form and bring it to the branch of your choice with your valid ID.
9. If you don't have a hit, you will get your clearance the same day.

Monday, May 8, 2017

How To Get Your Airfare for Half the Price?


Free stuff! Who doesn't want one, right? If you can get half of the airfare price for free, that is a chance you should not pass. But would you be able to do that exactly?

Disclamer: I am not a Credit Card promoter/agent or whatever. If you are interested, contact the bank or there are so many agents promoting in malls. Just make sure it is a Cashback or Rewards type of card.


Almost a year ago, I changed the way I look at a credit card. It's not credit for me, it is POINTS. I use it not to buy things that so expensive that I "needed" to borrow money, I use it to pay regular bills that I will pay for anyway in cash or at the bank. In this way, I earn so much points monthly without going out of my budget because, IT IS MY BUDGET.

If you want to know more about this habit that I have adapted, proceed here. I am using a Rewards Card from Citibank and so far, I have accumulated 53,000+ in one year! Because of this, I have booked a flight to Korea for about PHP 6,000 instead of  PHP 12,000 (with tax). And note that, I booked this only 3 weeks before that actual flight.

If you are interested for a packaged tour in Seoul, South Korea, Trazy.com is a good source for discounted tours!


trazy.com

Friday, March 10, 2017

How To Study and Live in New Zealand?


Education is an investment you will never go bankrupt in, especially is it is taken in a country with high standards. Having an education taken up abroad is a really big plus on your resume and also on your personal development.


Here are the steps explained simply:

Step 1. Decide what you want to study. 


Note that the course you should take should be relevant to your background. Meaning, your educational background and experience should be connected because immigration would likely refuse to give you a student visa.

For example, you have a health related degree in your country, it is unlikely that you will be approved by immigration. Technically, you can apply, you just need to justify the career switch. Some acceptable reasons are you already made the career switch in your country (you should provide proof for this like Certificate of Employment in that line of work) or you are inheriting a business and you need the education to manage it.

Step 2. Look for schools that offer your target course.


The universities in New Zealand are much more expensive than other type of schools such as polytechnics and private schools. Usually, their websites provide enough information on the their offered courses. While you are at their website, you should also check the required IELTS band score for their admission.

You should also check with NZQA about the school standing you are interested in. You should target an education provider with 1 or 2 rating.

Step 3. Take and pass IELTS.


Most of the schools in New Zealand require a minimum band score of 6.0 which is relatively lower than other countries. You may opt to review in a facility like http://ninerreview.blogspot.com/ or do a self-review.


Step 4. Apply for the school and complete your requirements.


There are multiple educational agencies that offer their counseling and assistance for this but you can do this by yourself. However, it it better to have assistance from people who have ample knowledge about this stuff. Requirements usually include Transcript of Records, Diploma, Birth Certificate, and Passport.

Step 5. Process your student visa.


Once you've accepted the letter of admission from the school you are entering, you can now start applying fr your visa. Your Statement of Funds is an important factor here. You should have enough funds to cover the tuition and living costs. There are scholarships available however, some of these require the scholar to go back to their country for two years after schooling. If education is you only target, this is prefect for you but if you are aiming for migration, you might want to pass on this one.


Step 6. Go study!

NOTE: These information above are the ones I've learned while attending seminars and inquiring immigration. I am no expert on this.
Goodluck! For any concerns, just drop a comment below.

How To Pay SkyCable/SkyBroadband/SkyBundle Using Your Credit Card?

NOTE: This post is for Citibank credit card


In able to pay your SkyCable bill online, you should first add it as a merchant. For SkyCable, you only need your account number to add it as a merchant on Citibank Online payment system.

Here's how to add:

Step 1. Go to https://www.citibank.com.ph/ then log in to your account.


Step 2. Proceed to Payment and Transfers. Then select Add Payee under Manage Payee menu.


Step 3. Click Search, click View Merchant or you can type in SkyCable in the search box.

Step 4. Choose your Payee Type. Set a nickname to your merchant so that you can remember it better. Enter the Account number in your SkyCable bill. Click Next to confirm.


To pay:

Step 5. Click Pay Utility Bills.

Step 6. Select the merchant/mickname which is SkyBundle - Ella XXXXXXX then enter the amount due. Click Next.


Step 7. Click Confirm and Pay.

You're done! Or you can view your record then email it to your registered email address.


Wednesday, April 6, 2016

How To Earn Extra Money (Online and Offline)?


Want to be your own boss and earn money? Who doesn't, right? You might be surprise to find a wide range of ways to earn money while not being an employee of some sort. Not everybody wants to be employed, not forever at least. But how could you let go of the job if you need income.

Because of the birth of the internet, not to mention, the social media, this is now easier to achieve.

These are not ranked according to any criteria.

1. Monetize a blog
Investment: Patience and skills


What you need: Internet connection, blog, AdSense account


2. Invest in stocks
Investment: Minimum of 5K


What you need: Money, Stock broker platform
Think that stocks is intimidating if you don't have a financial education background? Wrong. If you are aiming for long term investment, all you need to do is open an account, buy some good stable stocks and you are good to go. One of the leading stock broker platforms in the country is COL Financial. Their office is in Ortigas and it only takes 15 minutes to open an account with them, here is a step by step guide for beginners


3. Sell your old items
Investment: Time


What you need; Pre-owned items, websites like eBay.com, OLX.com
Decrease the clutter, increase your money. May it be clothing, books, gift items, appliances, sell them all! You'd be surprise.
If you have the space to hold a garage sale, you could do this also.

4. Sell your photos
Investment: Photos


What you need: Quality photos
Quality photos meaning with quality content not hd quality. Although, that is a plus too. There are websites and apps that let you sell your photos and gives you a cut whenever someone downloads it. Some apps are shutterstock and eye-em.

5. Freelancing
Investment: Skills


What you need: Website to advertise you skill


6. Attending in research market discussions
Investment: Opinion


What you need: Invitation to a focus group discussion

Tuesday, April 5, 2016

How To Pay Meralco Bills Through BPI Express Online?

The steps below shows how to pay Meralco bills using your BPI Express Online. This only works for those who already have a BPI Express Online account. Also note that overdue Meralco bills CANNOT be paid thru this method. For Metrobank, proceed here.


Step 1. Sign in to https://secure1.bpiexpressonline.com/AuthFiles/login.aspx?URL=/direct_signin.htm


Step 2. Make sure MERALCO is enrolled as a biller, here's how. Proceed to Payments and Reloading > Pay Bills Today
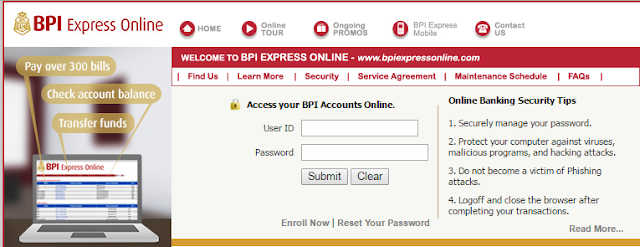


Step 3. Fill up the required information. ATM/Reference Number can be found at the bottom left of the Meralco bill.

Step 4. Double-check the information you entered Click submit and confirm.

For questions, please feel free to leave a comment or call BPI hotline.

Sunday, April 3, 2016

How To Pay Your Meralco Bill Using Your Credit Card?


NOTE: This post is for Citibank credit card

By enrolling your merchant to your credit card, you also earn points. You earn something from something you will pay anyway monthly. Hello, reward points! Then, you can use those points to book a flight! Here's how I booked a flight to South Korea for half the price using my earned points throughout a year. :) Just make sure to pay your credit card bills ON TIME!

Unlike any other merchants in Citibank online (Sky, Globe, Smart), Meralco changes your reference number every month so you cannot enroll it permanently in your Citi account. Instead, you have to treat it as a One Time Bill Payment.

Here's how:

Step 1. Go to https://www.citibank.com.ph/ then log in to your account.


Step 2. Proceed to Payment and Transfers. Select One Time Bill Payment from the To Account dropdown box.

Step 3. Click Search, click View Merchant or you can type in Meralco in the search box.

Step 4. Enter the ATM/Phone Reference No. in your Meralco bill. It is located at the bottom left part of your bill.


Step 5. Click Confirm and Pay.

You're done! Or you can view your record then email it to your registered email address.